Adding sliders to your sketches
Creating a slider in p5js is straightforward:
let slider;
function setup(){
  slider = createSlider(0, 255, 100);
  slider.position(10, 10);
  slider.style('width', '80px');
}
The createSlider function requires 4 input values: min, max, value and step.
- Min: the smallest value that the slider can represent, inasmuch when you drag the slider thumb all the way to the left.
- Max: the largest value that the slider can represent, inasmuch when you drag the slider thumb all the way to the right.
- Value: the default value of the slider, meaning the value that the slider will start with when you create it. Note, it should be in between the min and max value.
- Step: the value by which the slider is incremented or decremented when you drag it right or left. Basically it determines the spacing between ticks that the slider will snap to. Make sure that this value is smaller than the difference between the Min and Max value, otherwise the slider isn't usable. If set to 0 the slider will move continuously from left to right.
The two other lines underneath it specify it's position and it's style.
Getting slider values
Getting the slider value can be done as follows:
let val = slider.value();
If done in the draw loop, the variable 'val' will always contain the value to which the slider is set. Here is an example sketch where we set the background color with the three sliders:
Styling your slider
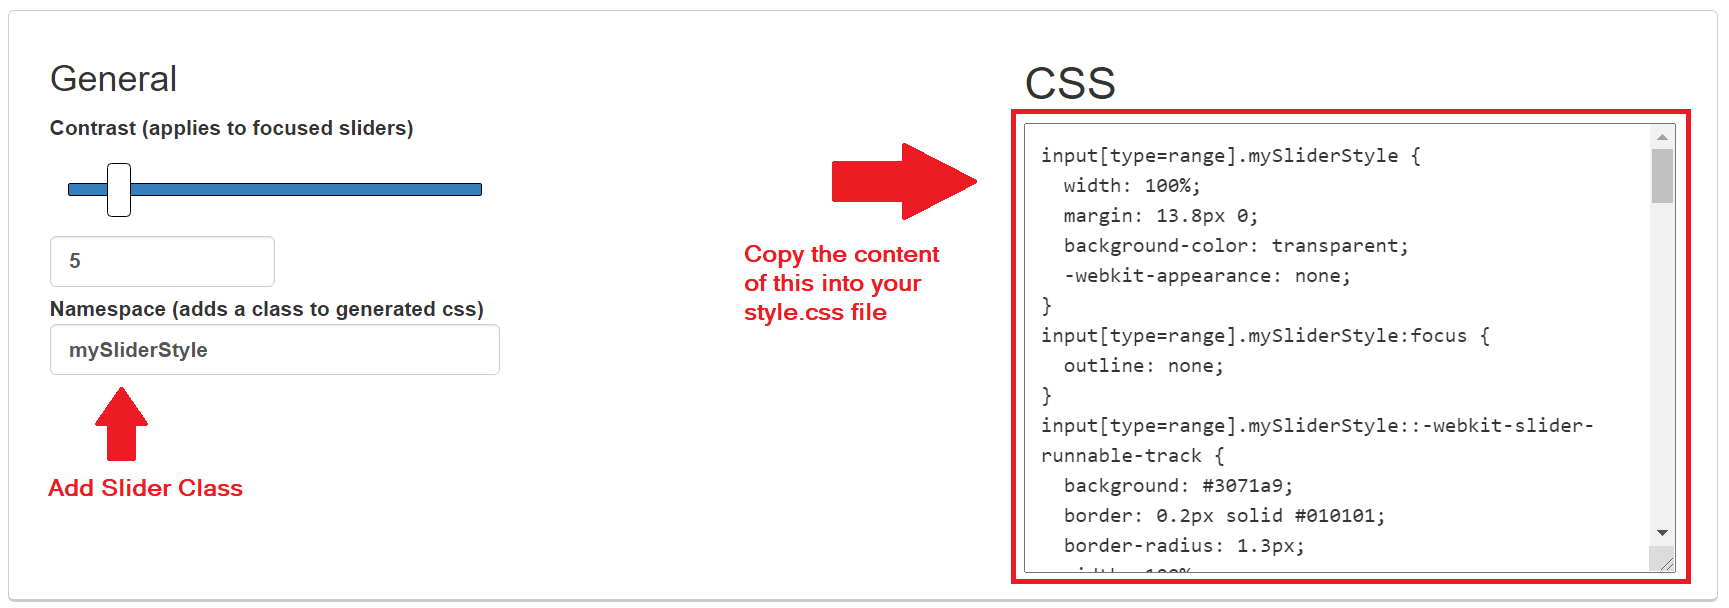
The default slider style doesn't look very nice but we can easily remedy that by using Daniel Stern's awesome website. It lets you customize your sliders simply by dragging other sliders that specify different attributes like color and size of the various parts of your slider.
Then you simply copy paste the generated css code into the style.css file of your sketch that is referenced in the index.html of your sketch. Make sure that you add a class of your own for the generated css code:
And to add the class to a specific slider you need to call this function:
slider.addClass("mySliderStyle");
Styling your slider programmatically
However you can also style your slider entirely by using the style() function. Here's a great example by Allison Parrish:
The style function is super useful in this case, where it let's us set any style keyword directly.
Updating slider position on window Resize
When we want our sketches to be responsive we usually also include the windowResized() function, that triggers when the window containing our sketch is resized. The windowResized will usually look something like this:
function windowResized(){
  resizeCanvas(windowWidth, windowHeight);
}
Inside the windowResized() function we're calling the resizeCanvas() function and giving it as inputs the new dimensions of the screen. If you were to do this, while there is a slider on your canvas that you created earlier, you'll notice that it's going to remain in it's previous position and not update along with the new screen dimensions (happens when you click the minimize button in your browser for example). You'll have to update the slider position manually, this involves deleting the slider and then creating it again:
let slider;

function makeSldr(){
  slider = createSlider(0, 255, 127,1);
  slider.position(width-90, 10);
  slider.style('width', '80px');
}

function setup(){
  createCanvas(windowWidth, windowHeight)
  makeSldr()
}

function windowResized(){
  resizeCanvas(windowWidth, windowHeight);
  slider.remove()
  makeSldr()
}

function draw(){
  background(0)
}
Here we're removing the slider element from the DOM via the remove() function, and then re-adding it to the canvas with the helper function that we created. Try it out for yourself here (try in present mode). Try commenting out the slider.remove() line and notice the difference.
Multiple Sliders
Sometimes you'll want to manage multiple parameters at the same time, with multiple sliders and you'd like them to stay in the right place when resizing the canvas. That can get very hairy very quickly. Another problem that we run into when removing the slider from the DOM and re-creating it is that it's default value is reset. This is not good, ideally we want to have the current position of the slider persist while resizing the canvas. One solution would be to create slider handler class in which we wrap the slider and can store the updated slider value:
let numSliders = 5;
let sliders = [];
function sliderHandler(minV, maxV, dflt, step, posX, posY, s){
  this.minV = minV;
  this.maxV = maxV;
  this.dflt = dflt;
  this.step = step;
  this.posX = posX;
  this.posY = posY;
  this.s = s;

  this.slider;
  this.updatePosition = function(x,y){
    this.posX = x;
    this.posY = y;
  }

  this.makeSlider = function(){
    this.slider = createSlider(this.minV, this.maxV, this.dflt, this.step);
    this.slider.position(this.posX, this.posY);
    this.slider.style('width', s+'px');
  }

  this.removeSlider = function(){
    this.slider.remove()
  }
}

function setup(){
  createCanvas(windowWidth, windowHeight)
  numSliders = 5;
  for(n = 0; n<numSliders; n++){
    sliders.push(new sliderHandler(0, 255, 127, 1, windowWidth-90, 20*n, 80))
    sliders[n].makeSlider();
  }
}

function windowResized(){
  resizeCanvas(windowWidth, windowHeight);
  for(n = 0; n<numSliders; n++){
    sliders[n].removeSlider();
    sliders[n].updatePosition(windowWidth-90,20*n);
    sliders[n].makeSlider();
  }
}
I'm not certain this is the best way to do it, but it does the job. If you have any other suggestions to improve this post, let me know in the comments! Otherwise cheers and happy sketching!