I'm super excited about this blog post, because it's the start of a series of posts on Perlin Noise, which is a wonderful tool to have in your arsenal.
With perlin noise we can create smooth and interesting shapes that we wouldn't otherwise be able to make. This series will focus on Perlin Noise, particularly in combination with the curveVertex() function, which we will make heavy use of. When starting out in creative coding, it might be difficult to move away from circular and rectangular shapes, as these seem to be the most natural things to code up.
Whilst drawing freehand on a paper, it's only natural to utilize smooth curves instead of hard edges and perfect circles. Perlin noise allows us to explore this venue through code. In p5js we can invoke perlin noise through the noise() function, which works fundamentally different than the random() function. We'll discuss the difference between them in a bit. There already are great resources that explain Perlin Noise in great detail, such as this writeup by Gene Kogan (I also recommend checking out his website. Especially if you want to get into AI art). As well as Daniel Schiffman aka the Coding Train's introductory video on Perlin Noise.
The special thing that will, hopefully, set this tutorial apart from already existing tutorials, is that it will exemplify how to use Perlin Noise in a number of specific scenarios. Where we'll start gentle and then iteratively increase the difficulty.
P5's noise() function
The noise() function is actually a little tricky to figure out by just messing around with it, since you can use it in a number of different ways. The random() function in P5JS accepts a specific range and returns a random number within this range. The noise() function however can accept 1, 2 or 3 numbers as input arguments.
Let's begin with a simple example, similar to the example shown in the Coding Train's video, where we modulate the position of a circle with the output of the noise() function:
function setup() {
  createCanvas(400, 400);
}

function draw() {
  background(220);
  var n = noise(millis()/1000)
  n = map(n, 0, 1, -100,100)
  ellipse(width/2 + n, height/2, 20)
}
Things to consider here:
- The input value to the noise function is not a range between two numbers but rather a linearly increasing parameter, such as millis(), frameCount or simply a counter that you update each drawloop
- the returned value from the noise() function is always in the range of 0 and 1, that means that we have to scale it accordingly to invoke an observable movement to the ellipse we're drawing
- To do this scaling we can use the map() function, which simply remaps from one range to another. Here the initial range was between 0 and 1, and we would like it to be between -100 and 100 to make the ellipse move from side to side.
This is a very basic example of what you can do with Perlin Noise, next we'll look at something more interesting.
2D Perlin Noise
As said, the noise() function accepts 1, 2 or 3 input parameters. The example above illustrated 1 dimensional perlin noise behaviour when modulated with time. Next well have a look at 2 dimensional perlin noise, and see how the noise() function reacts to different input parameters. In the following example we'll draw a relatively fine grid of rectangles to the canvas, where each rectangle is colored based on a value returned by the noise function. The input to the noise function will simply be the coordinates of the rectangle on the canvas (we could also do this on a pixel level but then things would be very slow). The code looks as follows:
function setup() {
  createCanvas(200, 200);
}

function draw() {
  background(220);
  noStroke();
  for(i = 0; i < height; i+=3){
    for(j = 0; j < width; j+=3){
      var n = noise(i,j)
      fill(n*255)
      rect(i,j,3)
    }
  }
  noLoop()
}
Now we obtain something that doesn't look very good, or anything like Perlin noise:
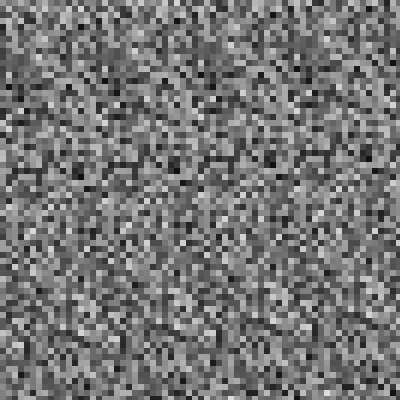
That's because we missed an important detail, the steps between our coordinates are too large and we need to scale them down to get a finer result. The official reference states:
Another way to adjust the character of the resulting sequence is the scale of the input coordinates. As the function works within an infinite space the value of the coordinates doesn't matter as such, only the distance between successive coordinates does (eg. when using noise() within a loop). As a general rule the smaller the difference between coordinates, the smoother the resulting noise sequence will be. Steps of 0.005-0.03 work best for most applications, but this will differ depending on use.
Hence we can simply multiply or divide the input coordinates by a number:
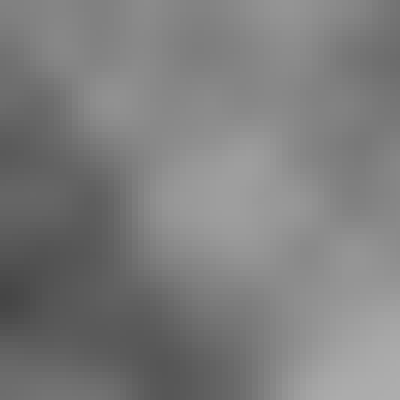
var n = noise(i*0.005,j*0.005)
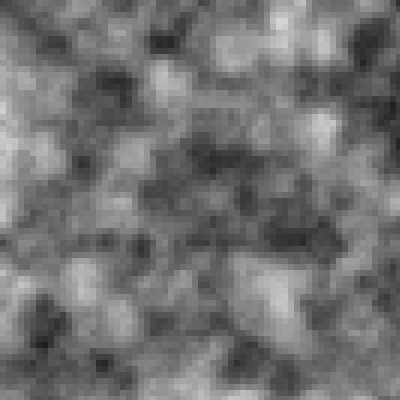
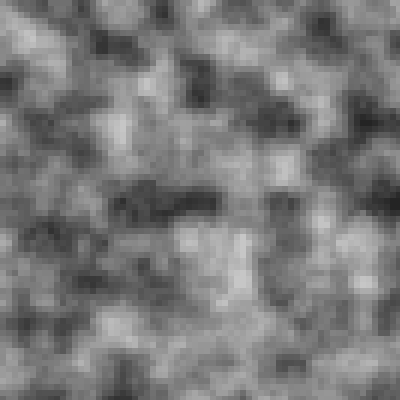
And we should obtain a canvas that looks like it has a cloudy/milky texture to it, which is the desired effect and what 2D perlin noise looks like:

Depending on your use case you might want to use a different scale, 0.05 also looks good in this case (image on the right). But remember that it also depends on the stride at which we're drawing our rectangles to the canvas.
Another cool thing about this is that 2D Perlin Noise is an infinite space, such that if we were to increment the input coordinates at each time step, we can obtain an infinitly scrolling effect:
//in the draw loop
for(i = 0; i < height; i+=3){
    for(j = 0; j < width; j+=3){
      var n = noise(i*0.005 + t,j*0.005+t)
      fill(n*255)
      rect(i,j,3)
    }
  }
t+=0.05
Incrementing the x and y coordinates every draw loop, allows us to shift the noise landscape. This makes it seem as if we were flying above a landscape:

var n = noise(i*0.005+t,j*0.005)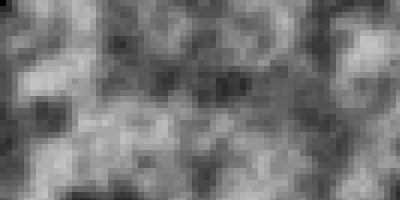
var n = noise(i*0.005,j*0.005+t)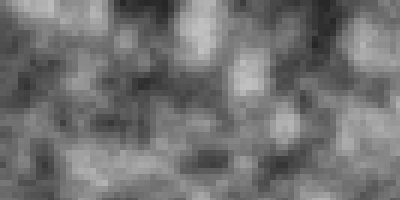
If we were to multiply or divide it we would obtain a zoom out / zoom in effect respectively. For zooming out and zooming in respectively:
var n = noise(i*0.005*t,j*0.005*t)

var n = noise(i*0.005/t,j*0.005/t)

Naturally, you can get more creative by plugging in different functions into the noise() function.
3D Perlin Noise
The little tricks we did above are neat, but what if we want to modulate the noise texture itself with time? That's where the 3rd parameter comes into play, here we keep the position of the perlin space the same, but modulate the color of each square via the 3rd parameter, in this sense the 3rd parameter is the z axis and is manifests itself as a change of color of each rectangle. This allows us to obtain a wobbly texture that seems to wobble back and forth:
function setup() {
  createCanvas(200, 200);
}
let t = 0
let rez = 0.05
function draw() {
  background(220);
  noStroke();
  for(i = 0; i < height; i+=3){
    for(j = 0; j < width; j+=3){
      var n = noise(i*rez,j*rez, t)
      fill(n*255)
      rect(i,j,3)
    }
    t += 0.0003
  }
}
We can also leverage this to obtain some color in our sketch, we simply create three different noise variables and plug their result into the respective r, g and b inputs of the fill() method:
let t = 0
let rez = 0.05
function draw() {
  background(220);
  noStroke();
  for(i = 0; i < height; i+=3){
    for(j = 0; j < width; j+=3){
      var n = noise(i*rez,j*rez, t)
      var n1 = noise(j*rez, t, i*rez)
      var n2 = noise(t,j*rez,i*rez)
      fill(n*255, n1*255, n2*255)
      rect(i,j,3)
    }
    t += 0.0003
  }
}

And to wrap up, you could also get creative with a chromatic wash like this:
var n1 = noise(i*rez,j*rez, t)
var n2 = noise(i*rez-t,j*rez, t)
var n3 = noise(i*rez+t,j*rez, t)
And that's about it, in the next tutorial we'll have a look at making smooth curves with perlin noise and the curveVertex() function.