
You spent hours coding up a nice sketch in P5JS or Processing, ironed out those last few bugs, and made it run smoothly at a crispy 50FPS... but now what?
Share it on Twitter, of course!
Wait a second... how do you actually do that?
Making GIFs out of your creative coding sketches can be tricky and tedious. If you haven't done it before. But there are a number of tools and tricks that can make our life easier in this regard, which we'll go over in this blog post.
Actually, the really hard part is making your GIFs smaller than 15mb. Screw you Twitter. But fret not, everything in due time. Let's take this one step at a time.
Exporting your Sketches as a Series of Individual Frames
Generally the first step is to extract individual frames from we'll first have to extract and save individual frames from our animation and then convert them into a complete GIF. We'll tackle these two steps, one at a time!
With Processing
In processing, saving an indivdiual frame is very straight forward. We can simply call the save("frame.png"); function in the draw loop, and an image will appear in the corresponding sketch folder. Obviously, we'll have to pass a different name for each frame, otherwise we would be overwriting the same file over and over again. We can do this with the help of a counter that gets incremented every draw loop:
int counter = 0;
void draw(){
   save(counter + ".png");
   counter++;
}
Notice that in java it will implicitely cast the counter integer to a string.
With P5JS
In p5js it's a little bit trickier, but we have a couple of options here, in no particular order:
- Making use of the saveCanvas function. Golan Levin has a fantastic loop template for this purpose (among others)
- Using CCapture, to export the frames. For this one, Jeff++ has made a fantastic loop template and in depth explanation for this which can be found here and an in depth explanation here
- If you're lazy like me, you can use the createLoop package, which can be found here
The saveCanvas() function
Golan Levin's template works well, however you might have to rate limit the frame rate of your sketches for this to work well. In other words, running your sketch at full 50-60FPS, and trying to save each individual frame in quick succession might be taxing on your browser. I've tried with chrome and microsoft edge and in both cases they tried to throttle these quick downloads, making it such that many frames were missing in the final output folder.
After some help from the birbs nest discord it seems that setting the FPS via the frameRate() command to something low like 1-5 frames per second, makes it much more consistent and reliable. However it takes a tad bit longer that way.
Saving frames with CCapture
CCapture is a javascript library for capturing canvas based animations, such as the P5JS canvas for example. The library can be found here.
Jeff's template is simply fantastic and everything you basically need. After running your sketch and setting the parameters in the code, you'll receive a .tar file that holds all the frames that you require to make your GIF.
Using the createLoop package
This one doesn't give you the individual frames per se, but directly creates a GIF underneath the P5JS canvas, which you can then save to your device. Since a GIF is merely a concatenation of frames, you could then load that GIF into your editor of choice to make some changes, or manipulate it with a command line tool like FFMPEG.
The createLoop package can be used as follows in your sketch, where you'll have to add a new script tag in the html file, and a single line in the setup function of your sketch. The html:
<html>
  <head>
    <script src="https://cdnjs.cloudflare.com/ajax/libs/p5.js/1.4.0/p5.js"></script>
    <script src="https://cdnjs.cloudflare.com/ajax/libs/p5.js/1.4.0/addons/p5.sound.min.js"></script>

    <!-- The createloop tag -->
    <script src="https://unpkg.com/p5.createloop@0.2.8/dist/p5.createloop.js"></script>

  </head>
  <body>
    <script src="sketch.js"></script>
  </body>
</html>
And your setup function will look as follows:
function setup() {
    createCanvas(400, 400)
    /*
      other stuff you want to do in the setup function
    */

    FPS = 50
    frameRate(FPS)
    createLoop({duration:3, gif:true})
}
The createLoop function will automatically render your GIF at the frame rate given to the frameRate() function. Also note that the createLoop() function has a number of other options, a rundown of which you can find in the documentation here.
One downside that I want to point out, is that when you try to create large GIFs with createLoop(), for example a 10 second GIF at 50 FPS, it will take a significant amount of time. And there is no indication of progress. However it's still being worked on, and might be my go to way in the future.
Next up, concatenating your frames into an actual GIF!
Converting a Series of Frames into a GIF
For concatenating individual frames into a GIF we got another slew of different ways to do it. We'll first have a look at two famous CLI (command line interface) tools, namely FFMPEG and ImageMagick. And then we'll have a look at some other online and offline options like ezgif and ScreenToGif
Command Line Interface Tools
The two big contenders in this category are FFMPEG and ImageMagick, which can best be described as "Image Processing and Management" tools, and they can both be used as command line interfaces.
It's also very likely that you've used one or the other before, hidden underneath the hood of some other image processing software. Personally I haven't used ImageMagick before, but I can vouch for FFMPEG. I haven't been in a "media convertion" situation where FFMPEG didn't have a command that solved my issue.
I've got a full blog post for each one of these in the works, but for now I'll provide quick instructions and a quick command for each one of them.
Using FFMPEG
FFMPEG can be downloaded from here , installation instructions can conveniently be found on WikiHow.
A quick command to turn frames into a gif would be:
ffmpeg -i %d.jpg output.gif
Yes, it's as simple as that with ffmpeg. Obviously this is just the tip of the iceberg, and there's many, MANY more things you can do with it. I'll cover these in detail in a future post.
Using ImageMagick
For our purposes, ImageMagick and FFMPEG are interchangeable, they'll both let you create GIFs from a sequence of frames among other things. ImageMagick is very simple to install (simply download the executable and make sure that the 'add PATH' checkbox is checked). A simple command to convert our frames into a GIF would be:
magick convert *.png output.gif
Neat! Hereby we've covered the two most famous command line interfaces for image processing. Another noteworthy mention here is gifski, another CLI tool. However at this point I'm not certain if it has any advantages over ffmpeg or ImageMagick.
Using EZGIF
Ezgif.com is a simple online GIF maker and toolset for basic animated GIF editing. Granted, I've never used it to convert frames to a GIF, but it's definitely something you can do, if you don't want to bother installing anything on your device. It also has a number of other features, one of which, that I use myself a lot, is the GIF compressor/optimizer, I've almost always been able to shave a couple of megabytes from my GIFs using it.
You can create your GIF on the GIF maker tab, where you simply upload your frames:
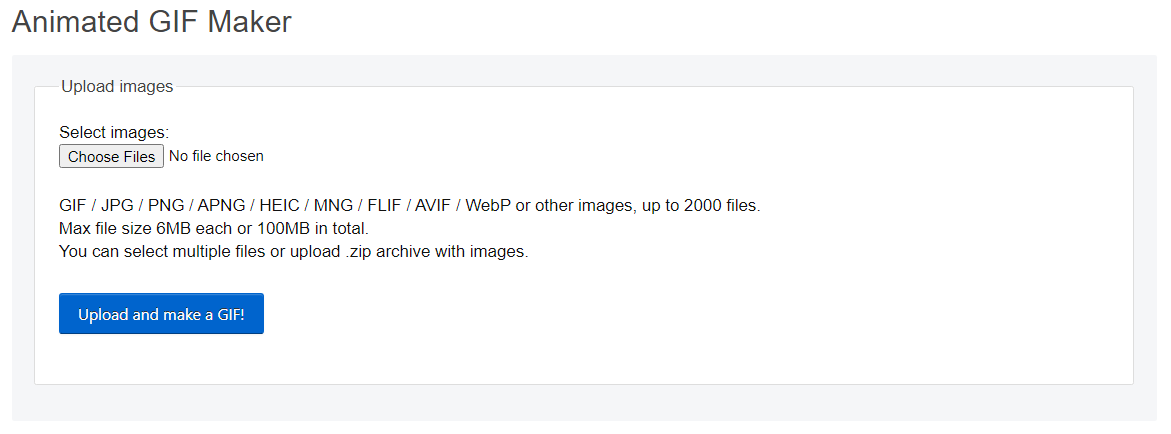
Naturally, there is a slew of similar websites, but I don't think any of them is as easy to use as ezgif.
Using ScreenToGif
Leaving the best for last, a wonderful little software called ScreenToGif. One of the main features of ScreenToGif is it's ability to capture a portion of your screen and export it as an animated GIf. This feature alone is already reason enough to download it:

However, it also has a very polished 'editor' section, which allows you to edit each individual frame of your sequence, and select from a plethora of different export options. It's what I'm currently using to make my GIFs, never has making GIFs been easier:
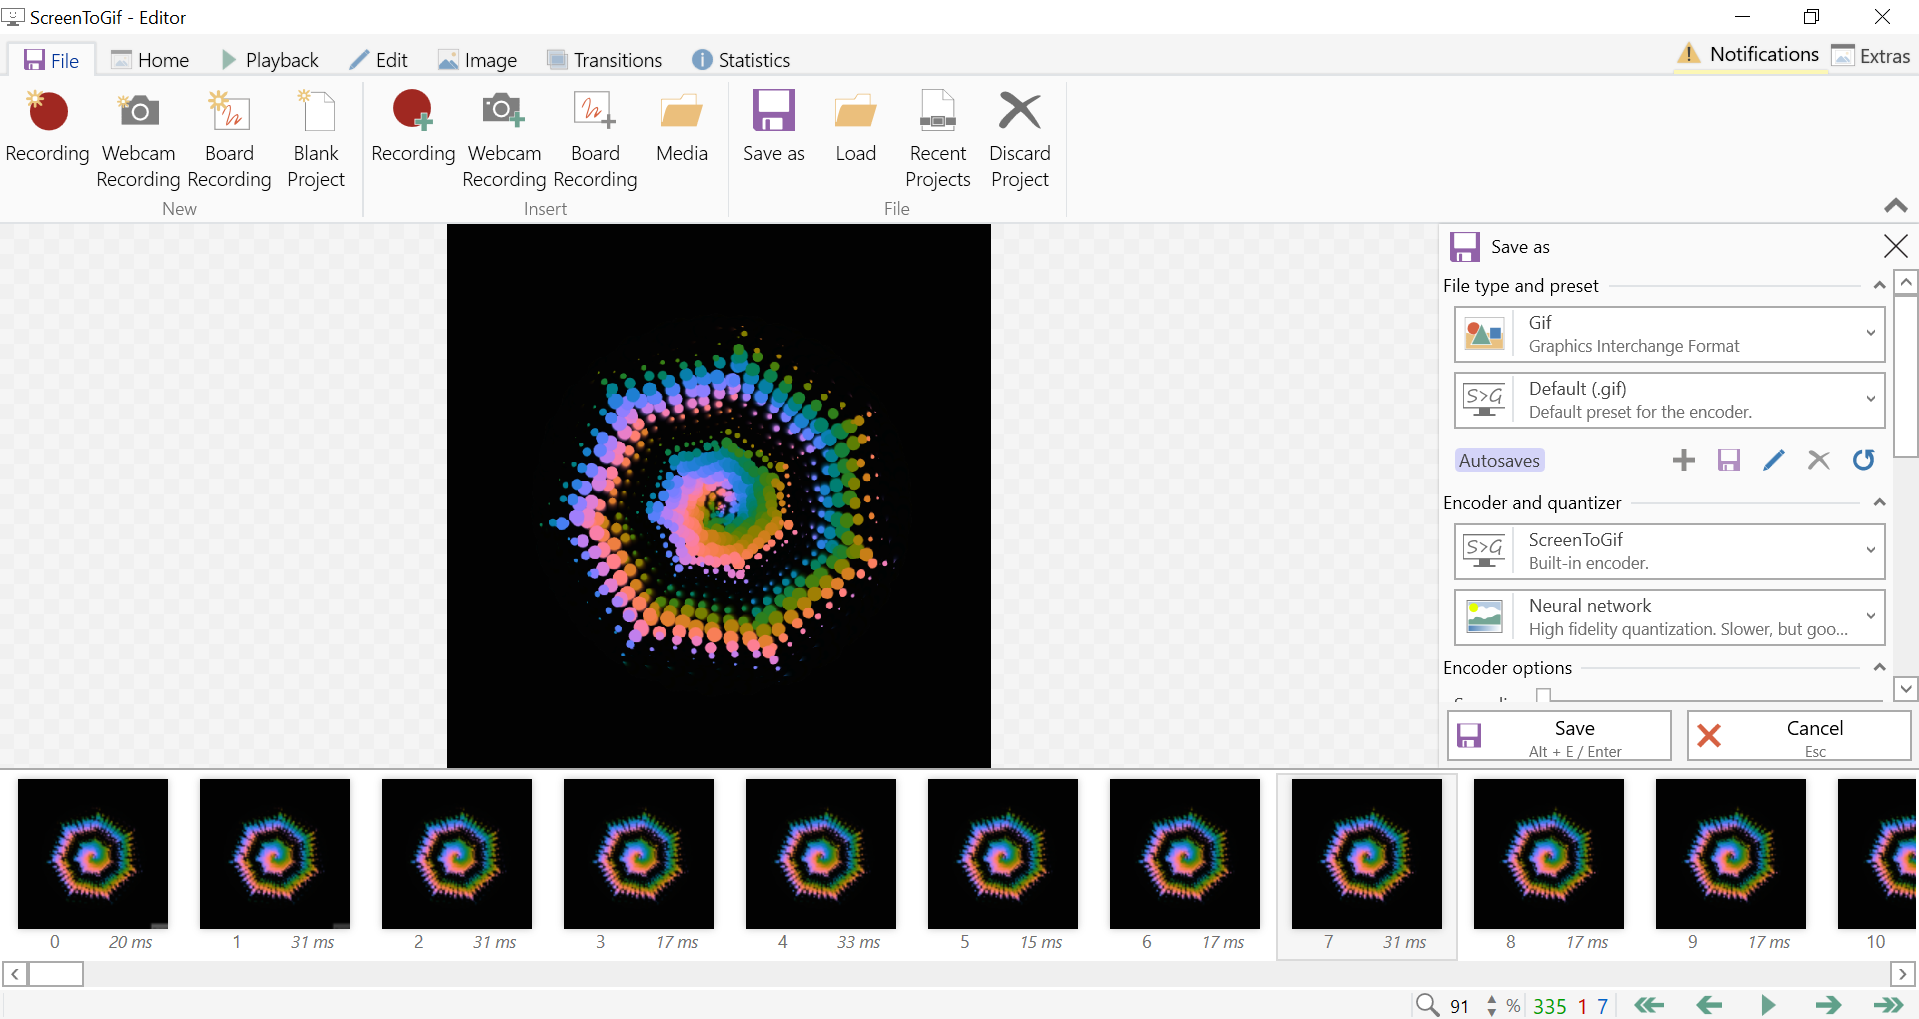
You could simply record your sketch's canvas with ScreenToGif's recording window, which is fine for WIP stuff, however the recommended way of doing it is first exporting the individual frames of your gif one by one and then loading them into the editor.
And that's a wrap! If there's any other methods you'd like me to add in the future let me know in the comments. If there's any parts you'd like me to elaborate on, also let me know in the comments. Otherwise, cheers and happy sketching!